
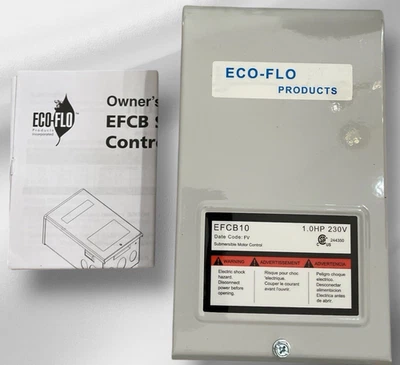
A well pump control box is the external electrical component that starts, protects, and helps run certain submersible well pumps. It is most often used with a three-wire submersible pump motor, although the “three-wire” description can be confusing because it usually refers to the motor leads plus a ground wire—not a standard household three-phase circuit.
The control box is not the same thing as a pressure switch, pressure tank, breaker panel, or pump controller. Each part has a separate job. When a home has no water, low pressure, or a pump that will not start, identifying which component is actually involved can prevent an unnecessary pump replacement.
Because a control box contains high-voltage electrical parts and is connected to equipment near water, homeowners should limit their role to safe visual checks and observations. Shut off power before touching the box, and leave electrical diagnosis, wiring changes, and component replacement to a qualified well or electrical professional.
What a Well Pump Control Box Does
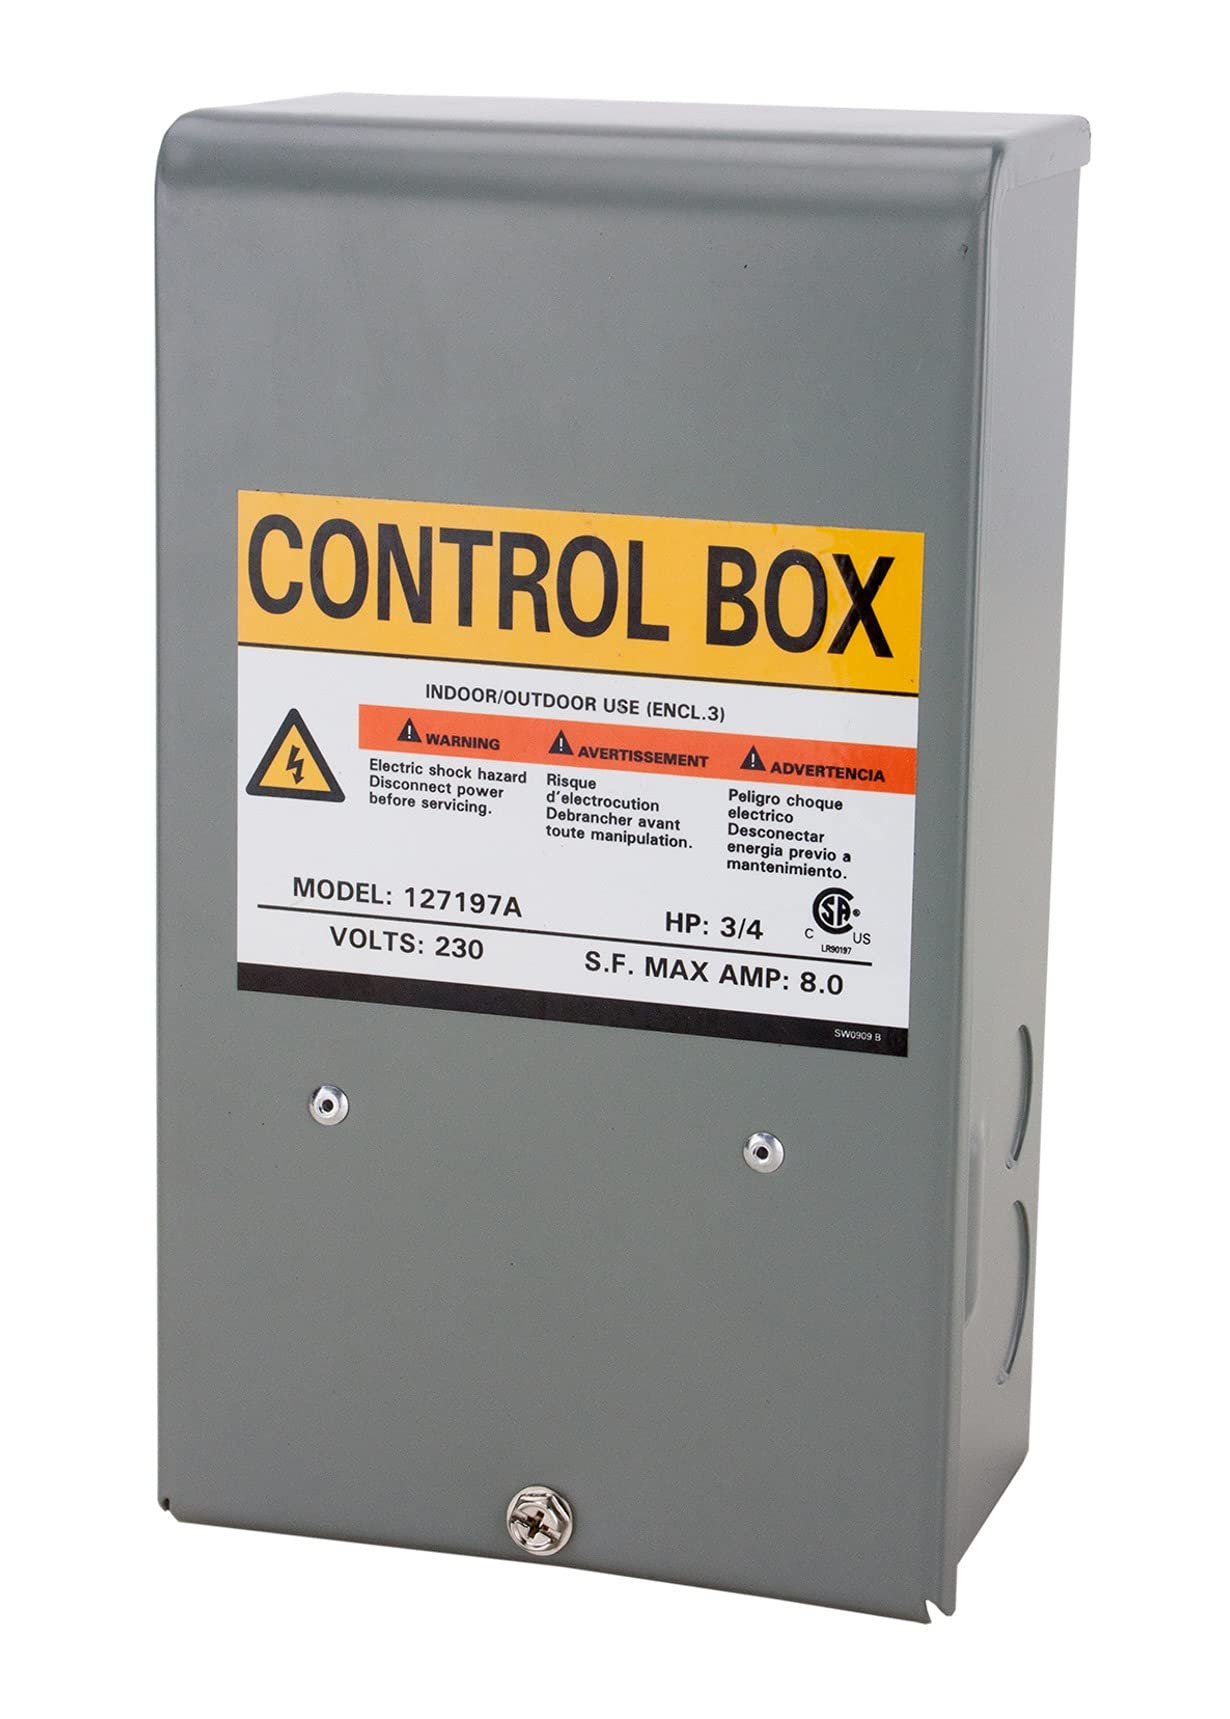
A well pump control box supplies the electrical boost and switching needed to start and operate many single-phase, three-wire submersible pump motors. It is generally mounted above ground near the pressure tank, pressure switch, or electrical service equipment.
When household water pressure falls to the pressure switch’s cut-in setting, the pressure switch calls for the pump to run. The control box then helps start the motor. Once the motor is running, the box’s internal components support normal operation and may provide overload protection.
Its exact function depends on the motor design, but a typical control box for a well pump may contain:
- Start capacitor: Provides extra starting torque so the motor can begin turning under load.
- Run capacitor: Helps some motors operate efficiently after startup.
- Start relay or potential relay: Disconnects the start circuit after the motor reaches operating speed.
- Overload protection: Helps protect the motor when it overheats or draws excessive current.
- Terminal connections: Connect incoming power and the motor leads from the well.
Not every box contains the same parts. The correct configuration is determined by the specific pump motor, not simply by the depth of the well or the appearance of the old box.
Which Pumps Need a Control Box?
Most residential well pump control boxes are used with three-wire submersible pump motors. These pumps are installed down inside the well, while the starting components remain in an accessible box above ground.
Many two-wire submersible motors do not use a separate external control box because their starting components are built into the motor assembly. In that design, the pump wiring typically runs from the pressure switch or other approved controls directly to the well.
This distinction matters when troubleshooting. A home with a two-wire pump may have a pressure switch, disconnect, pump protection device, or constant-pressure controller near the tank, but it may not have a conventional control box.
| System component | Main job | Usually found where? |
|---|---|---|
| Well pump control box | Starts and protects compatible three-wire submersible motors | Near the pressure tank, switch, or electrical equipment |
| Pressure switch | Turns the pump system on and off based on water pressure | Mounted on pressure-system plumbing |
| Pressure tank | Stores a limited amount of pressurized water and reduces pump cycling | Near the well supply line inside the home or pump house |
| Submersible pump motor | Moves water from the well to the home | Inside the well |
| Constant-pressure controller | Varies or manages pump operation to maintain pressure on compatible systems | Near the pressure system or electrical controls |
Three-wire versus two-wire submersible pumps
The phrase “three-wire pump” refers to a pump motor arrangement, not a universal wiring instruction. A three-wire motor normally has separate leads for the start and run circuits, plus a ground. The control box contains serviceable starting components outside the well.
A two-wire motor has fewer motor leads accessible above ground because its starting components are integrated with the motor. This can simplify above-ground equipment, but a failed internal starting component may require pulling the pump from the well for repair or replacement.
Neither arrangement is automatically better for every home. Pump selection depends on the well, pumping water level, required flow, total dynamic head, motor compatibility, electrical supply, and service preferences.
Jet pumps use different controls
Jet pumps are installed above ground and use a different motor and pumping arrangement from a submersible pump. Some jet pump systems include capacitors, relays, or motor controls, but they should not be assumed to use the same control box as a three-wire submersible motor.
Jet pump troubleshooting also differs because loss of prime, suction-side air leaks, and foot-valve problems can be involved. Do not apply submersible-pump control box advice to a jet pump without confirming the equipment type.
How the Control Box Works With the Pressure System
A private well system is a chain of components. A fault anywhere in that chain can create symptoms that seem like a bad pump or bad control box.
In a conventional pressure-tank system, the basic sequence is:
- Water is used in the home, and system pressure falls.
- The pressure switch closes at its programmed cut-in pressure.
- The switch sends power to the compatible pump circuit.
- The control box helps start the submersible motor.
- The pump sends water to the pressure tank and household plumbing.
- When pressure reaches the cut-out setting, the pressure switch opens and stops the pump.
A pressure switch may be responsible for starting and stopping the system, but it does not replace the motor-specific functions of a control box. Conversely, a good control box cannot compensate for a clogged filter, a waterlogged pressure tank, a damaged drop pipe, a depleted well, or a failed pump motor.
Credit: amazon.com
How to Identify Your Existing Control Box
Before ordering a replacement or calling for service, gather the information printed on the control box and pump documentation. A label inside or outside the enclosure may list the compatible motor series, voltage, horsepower range, wiring diagram, and manufacturer part number.
Useful information to record includes:
- Control box manufacturer, model number, and part number
- Motor manufacturer and motor model, if known
- Motor horsepower rating
- Required voltage and electrical supply details
- Whether the system has a three-wire or two-wire submersible motor
- Any visible wiring labels or terminal designations
- The symptoms, including when they started and whether they are intermittent
- Whether the pressure gauge rises, falls, or remains unchanged when water is used
Take clear photographs of the label and the overall installation without removing covers or disturbing wiring. This information can help a pump professional identify the correct control box and avoid a mismatch.
Why horsepower alone is not enough
Control boxes are often described by horsepower, but matching only the horsepower can be risky. Motors with the same nominal horsepower can have different electrical requirements, starting components, and manufacturer-specific control arrangements.
The safest replacement is the exact approved control box listed for the pump motor. If the original part is no longer available, use the motor manufacturer’s compatibility information or have a qualified technician verify an approved equivalent.
Common Signs of a Control Box Problem
A failed capacitor, relay, overload, loose connection, or damaged control box can stop a pump from running. However, the same symptoms can also come from a pressure switch, power supply issue, damaged cable, motor failure, dry-well condition, plumbing restriction, or pressure-tank problem.
Treat these signs as clues, not proof of a failed control box.
Pump does not start when pressure drops
If pressure falls below the normal cut-in point and the pump does not run, possible causes include a tripped breaker, an open disconnect, a failed pressure switch, a control-box problem, a protective device that has opened, damaged wiring, or a pump/motor fault.
Safe observations include whether the entire home is affected, whether the pressure gauge is below normal cut-in pressure, whether a breaker has tripped, and whether there has been a recent outage, lightning event, well service, flooding, or plumbing work. Do not repeatedly reset a tripping breaker; that can indicate a serious electrical or motor problem.
A humming sound but no water flow
A humming or buzzing sound near the controls can occur when a motor is trying but failing to start. A failed start capacitor or relay is one possible explanation. So are a seized pump, voltage problems, damaged wiring, or a motor issue.
Turn off power if the system is making persistent abnormal noise, smells hot, or repeatedly trips protection. Continued attempts to start a stalled motor can increase damage. A technician can perform the appropriate electrical and motor tests to separate a control-box fault from a down-well equipment problem.
Intermittent operation
A pump that works sometimes but not others may have a heat-related overload issue, loose connection, failing capacitor, unstable power supply, worn pressure switch, or declining pump motor. Intermittent symptoms can also appear when well yield is limited and the system is operating under difficult conditions.
Note whether the issue happens after extended water use, only during hot weather, after a storm, or when several fixtures run at once. Those details help narrow the diagnosis.
Burning smell, discoloration, or moisture in the enclosure
Scorch marks, melted insulation, corrosion, water intrusion, or a burnt electrical odor are urgent warning signs. Do not open the enclosure or attempt to clean terminals while energized. Shut off power at the appropriate disconnect or breaker if it can be done safely, keep the area dry, and contact a qualified professional.
Moisture is especially important to address because a box mounted in a damp basement, pit, crawlspace, or pump house may deteriorate even if the pump itself is still functional.
What Homeowners Can Check Safely
Well pump controls involve potentially lethal voltage. Avoid opening a control box, touching internal terminals, testing live circuits, bypassing an overload, or changing wiring based on a generic diagram. The wiring arrangement must match the exact motor and control equipment.
With power left on only long enough to make ordinary observations from a safe distance—or with power shut off before handling equipment—you can usually check the following:
- Whether water loss affects every fixture or only one faucet or appliance
- Whether the pressure gauge shows unusually low pressure or rapid pressure changes
- Whether a whole-house sediment filter is severely restricted
- Whether visible plumbing leaks are present near the pressure tank or treatment equipment
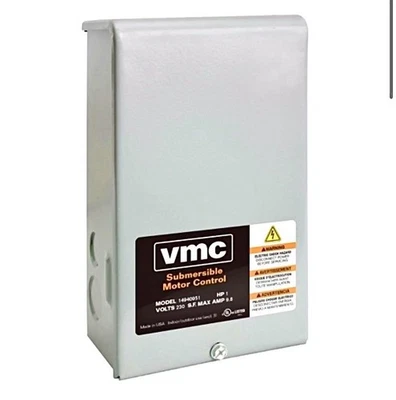
- Whether the control box exterior is wet, corroded, cracked, or unusually hot
- Whether the breaker or disconnect is off or has tripped once
- Whether the pressure switch appears to be calling for water based on the gauge reading
A clogged filter can cause low flow at fixtures even while the pump and control box are operating normally. Likewise, a waterlogged pressure tank can cause rapid cycling that is often blamed on the pump controls. Looking at the full pressure system before replacing parts is important.
Credit: ebay.com
Professional Diagnosis of a Control Box
A qualified well contractor or electrician can evaluate the pump circuit using the manufacturer’s specifications and appropriate test equipment. Depending on the system, diagnosis may include checking incoming voltage, examining connections, testing capacitors and relays, evaluating overload behavior, and measuring motor-circuit characteristics.
These tests matter because a control box can fail as a result of another problem. For example, a damaged cable or failing motor may place abnormal stress on a capacitor or relay. Replacing only the box could restore operation briefly without correcting the underlying cause.
A professional may also assess:
- Pressure-switch condition and system pressure behavior
- Pressure tank drawdown and cycling pattern
- Well recovery and pumping water level when low yield is suspected
- Restrictions from filters, valves, treatment equipment, or plumbing
- Evidence of lightning, surge, water intrusion, or rodent damage
- Compatibility between the installed pump motor and control box
Choosing a Replacement Control Box
The best replacement control box for a well pump is one approved for the exact motor. Do not choose a box based only on its physical size, a similar-looking enclosure, or an assumed horsepower match.
Confirm these points before replacement:
- Motor compatibility: The box must be approved for the motor’s make, model, and wiring configuration.
- Voltage: The control box must match the motor and available electrical supply.
- Horsepower and motor series: Use the manufacturer’s stated compatibility, not a guess.
- Control type: Verify that the pump actually requires an external control box.
- Environmental location: The enclosure should be suitable for its installation area and protected from water intrusion and physical damage.
- Existing system controls: Consider pressure switches, pump protection devices, generators, and constant-pressure equipment that may affect compatibility.
Do not upgrade a control box to solve a sizing problem
A larger or different control box will not increase well yield, fix low household flow caused by plumbing restrictions, or make an undersized pump suitable for a high-demand home. Pump sizing requires more than horsepower. It depends on the pumping water level, desired flow rate in gallons per minute, elevation changes, pipe losses, pressure requirements, and the pump curve.
If the home has always had poor flow, frequent pressure drops, or problems when multiple fixtures operate, ask a well professional to evaluate the complete pumping system rather than treating the control box as the only possible limitation.
Control Box Maintenance and Protection
Most well pump control boxes have limited routine homeowner maintenance. The priority is keeping the enclosure dry, accessible, and protected from damage. Follow the exact manufacturer instructions for the installed model, especially if a service professional recommends inspection or part replacement.
Good preventive practices include:
- Keep the area around the pressure system dry and free of stored items.
- Address roof, plumbing, or foundation leaks that expose electrical equipment to moisture.
- Do not cover the enclosure with insulation, boxes, or materials that prevent access or trap dampness.
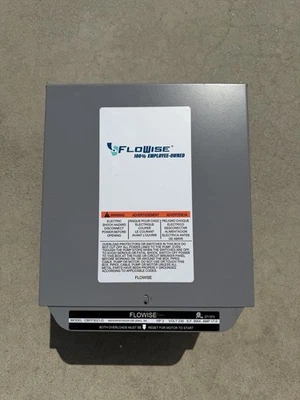
- Record the pump and control-box model information before an emergency occurs.
- Have recurring electrical or pressure-system symptoms evaluated instead of waiting for total water loss.
- Discuss properly designed surge protection with a qualified electrician or well professional where power disturbances or lightning are a concern.
Do not assume a control box is the only component affected after a lightning event or major electrical surge. The pressure switch, wiring, pump motor, and other connected equipment may also need evaluation.
Credit: ebay.com
When to Call a Well Professional
Call for qualified help promptly if the system has no water throughout the home, repeatedly trips a breaker, produces a burning smell, has visible electrical damage, or runs without building pressure. Those symptoms can involve equipment damage and may create electrical or pump-motor risks.
You should also seek service when the pump short cycles, pressure fluctuates sharply, water flow has gradually declined, or the control box has obvious corrosion or water intrusion. A clear symptom history, pressure-gauge observations, equipment labels, and recent changes to the system can make the service visit more efficient.
The practical goal is not merely to replace the control box. It is to confirm whether the control box, pump motor, wiring, pressure controls, tank, plumbing, or well itself is responsible for the problem.
Frequently Asked Questions
Can a well pump run without a control box?
Some pumps can. Many two-wire submersible motors have their starting components built into the motor and do not use an external box. A three-wire submersible motor designed for a control box generally needs its compatible box to start and operate correctly.
Is a well pump control box the same as a pressure switch?
No. A pressure switch responds to water pressure and signals the pump system to start or stop. A control box contains motor-starting and protective components for certain submersible motors. A system may have both components installed near each other.
Can a bad capacitor cause a well pump to stop working?
Yes, a failed capacitor can prevent a compatible three-wire pump motor from starting properly. But similar symptoms can result from a faulty relay, wiring problem, failed pressure switch, damaged motor, or pump issue, so testing is needed before replacing parts.
Where is the control box for a well pump usually located?
It is commonly mounted on a wall near the pressure tank, pressure switch, or electrical disconnect in a basement, utility room, garage, pump house, or similar protected location. It should be accessible for service and protected from moisture.
Should I replace the control box myself?
Because the box contains high-voltage connections and must match the exact pump motor, replacement is usually best handled by a qualified well professional or electrician. Incorrect wiring or an incompatible box can damage equipment and create a serious shock or fire hazard.