
Whole house filter replacement is routine maintenance, but the right method depends on the type of system installed. A sediment cartridge in a standard filter housing is replaced very differently from media in an iron filter, carbon tank, or backwashing system.
For most homeowners, the job involves identifying the filter, shutting off water safely, relieving pressure, replacing the correct cartridge or component, checking the seal, and watching for leaks when water is restored. Doing those steps in the right order helps prevent cracked housings, damaged O-rings, contamination, and unexpected low water pressure.
A replacement filter can improve flow and address problems such as visible sediment, but it does not prove that well water is safe to drink. If your water has changed in smell, color, taste, or clarity, consider laboratory testing to identify the cause before choosing or changing treatment.
First, Identify What Type of Whole-House Filter You Have
“Whole-house filter” describes where a system is installed: usually on the main water line after the pressure tank and before water reaches household fixtures. It does not describe one specific technology. Before ordering parts or opening anything, identify whether your system uses a replaceable cartridge, a reusable screen, or treatment media inside a tank.
| System type | What is usually replaced | Typical purpose | What to check before service |
|---|---|---|---|
| Standard cartridge housing | Sediment, carbon, or specialty cartridge | Captures particles or provides a specific treatment claim | Housing size, cartridge length and diameter, micron rating, and seal condition |
| Spin-down or screen filter | Usually no disposable cartridge; screen may be cleaned or replaced | Removes larger sediment such as sand, grit, or scale flakes | Screen condition, flush valve operation, and manufacturer cleaning instructions |
| Backwashing media tank | Media only when exhausted, damaged, or specified by the manufacturer | Iron, sulfur, manganese, sediment, carbon treatment, or other source-water issues | Control valve, backwash operation, drain line, treatment performance, and service manual |
| Whole-house UV unit | UV lamp, sleeve, and sometimes prefilter cartridge | Disinfection when properly sized and operated with suitable water quality | Exact lamp model, alarm status, sleeve condition, and pretreatment needs |
A cartridge filter is commonly a clear or opaque canister with a removable sump beneath a cap. It may have a pressure-relief button on top and a wrench designed to loosen the housing. A tank-style system is usually taller, connected to a control valve and drain line. Do not attempt to open a pressurized treatment tank or assume it contains a replaceable cartridge.
Know When a Filter Needs Replacement
Filter replacement schedules printed on packaging are only starting points. Actual service life depends on water use, sediment load, well conditions, cartridge size, and the filter’s purpose. A filter serving a home with fine silt or iron particles may load much faster than the same filter in a home with relatively clear water.
Common signs that a cartridge may be due for replacement include:
- Lower pressure or reduced flow throughout the house, especially when several fixtures run.
- A noticeable pressure drop across the filter, if gauges are installed before and after the housing.
- A visibly dark, discolored, coated, or sediment-filled filter cartridge.
- Recurring sediment in toilet tanks, faucet aerators, or appliance screens.
- Return of an odor, chlorine taste, or other issue the filter was specifically selected to address.
- A manufacturer-recommended service interval has passed, even if the cartridge does not look dirty.
Not every water problem means the filter is clogged. Low pressure at one faucet may be caused by a blocked aerator or fixture valve. Low pressure throughout the home can also involve the pressure tank, pressure switch or controller, pump, plumbing restrictions, water softener, or a partially closed valve. Check whether the problem occurs before concluding that the whole-house filter is the cause.
Use Pressure Gauges When Available
A pressure gauge before the filter shows incoming system pressure. A gauge after the filter shows how much pressure remains after water passes through it. The difference between the two is the pressure drop. A growing pressure drop while water is flowing often indicates that a sediment filter is loading up.
Gauge readings are more useful than judging a filter by appearance alone. Some cartridges clog internally before they look especially dirty, while a filter with visible staining may still pass water adequately. Follow the filter manufacturer’s recommended maximum pressure drop and service guidance when available.
Choose the Correct Replacement Filter
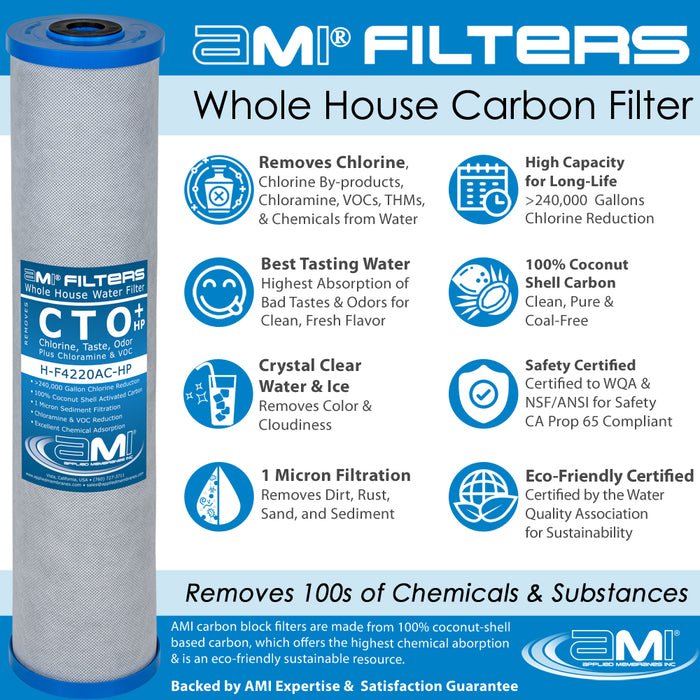
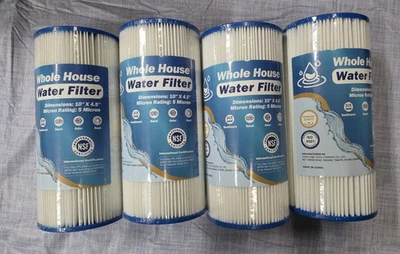
The most important rule in whole house filter replacement is simple: use a cartridge that fits the housing and is appropriate for the problem you are trying to address. A cartridge that physically fits may still have the wrong rating, material, flow capacity, or intended use.

Credit: airthereal.com
Match the Physical Size and End Style
Remove the old cartridge or read the housing label before buying a replacement. Note the cartridge’s length, outside diameter, and end-cap style. Some housings use common slim or large-diameter formats, but measurements and compatibility matter more than generic labels.
Do not force a cartridge into a housing. An incorrect fit can prevent proper sealing, allow water to bypass the filter media, or damage the housing cap.
Match the Filter to the Water Problem
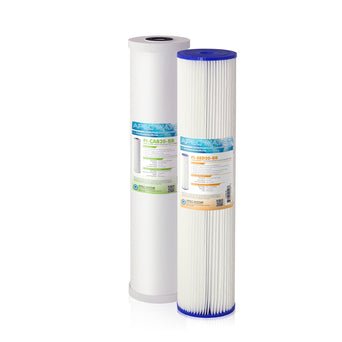
Sediment cartridges are designed to capture particles. They can help with sand, silt, rust particles, and debris, but they do not reliably remove dissolved contaminants merely because the water looks clearer afterward.
Carbon cartridges can reduce certain tastes, odors, and chemical contaminants when the exact cartridge is designed and certified for those claims. They are not interchangeable with sediment filters, and their performance depends on flow rate, contact time, water chemistry, and the cartridge’s stated capabilities.
Specialty cartridges may be marketed for iron, sulfur odor, scale, lead, nitrate, or other contaminants. Treat these claims carefully. A cartridge must be compatible with the water conditions and have an appropriate, model-specific performance claim. Well water with significant iron, manganese, hydrogen sulfide, or bacteria often needs a properly selected treatment system rather than a single point-in-time cartridge swap.
If you are concerned about a health-related contaminant, use a certified laboratory test to identify the analyte and concentration. A home screening kit, odor, color, or TDS meter cannot establish that water is safe or show whether a replacement cartridge is suitable for the hazard.
Understand Micron Ratings Without Overestimating Them
A micron rating describes the approximate particle size a sediment filter is intended to capture. Smaller micron ratings generally capture finer particles, but they can also create more pressure loss and clog sooner in sediment-heavy well water.
Micron ratings alone do not show whether a filter protects against microorganisms. “Nominal” ratings describe general particle reduction performance, while “absolute” ratings are tied to a more specific retention standard. Neither label should be treated as a universal promise of microbial safety. Filtration, UV disinfection, and chemical treatment serve different purposes.
Tools and Supplies to Gather Before You Start
Prepare everything before shutting off water. Leaving an open housing unattended while searching for a replacement part increases the chance of contamination or missed components.
- The correct replacement cartridge, screen, or manufacturer-approved service part.
- The housing wrench supplied for the filter, if applicable.
- A clean bucket, shallow pan, and towels for water remaining in the housing.
- Clean gloves if desired.
- A soft cloth for cleaning the housing and O-ring groove.
- Food-grade silicone lubricant if the housing manufacturer approves it for the O-ring.
- A replacement O-ring if the existing one is stretched, cracked, flattened, nicked, or missing.
Do not use petroleum-based lubricants unless the manufacturer specifically permits them. They can damage some seals and may not be appropriate for potable-water components.
How to Replace a Standard Whole-House Filter Cartridge
Work only on the water-side components you can safely access. Do not service live electrical equipment, alter pump wiring, bypass safety controls, or force a damaged filter housing. If the housing is cracked, severely stuck, leaking around a fixed connection, or installed in a complicated plumbing arrangement, contact a qualified water-treatment or plumbing professional.
- Confirm that you have the correct replacement. Compare the new cartridge with the old one for size, end style, and intended use. Keep packaging or instructions available for any model-specific requirements.
- Shut off water to the filter. If your system has an inlet shutoff valve immediately before the filter, close it. If there is a bypass, use it only if it is designed for your system and untreated water can safely be used temporarily. Otherwise, shut off the appropriate main water supply valve.
- Relieve pressure before opening the housing. Open a nearby cold-water faucet to reduce pressure. If the housing has a pressure-relief button, use it only as directed by its manufacturer. Never try to loosen a pressurized filter canister.
- Place a bucket beneath the housing. Even after pressure is relieved, water will remain inside the sump. Protect nearby flooring and electrical equipment from spills.
- Remove the filter sump. Fit the housing wrench around the sump and turn it in the direction indicated by the housing or manual. Support the housing as needed, but do not use pipe wrenches, improvised cheater bars, or excessive force that could crack plastic.
- Take out the old cartridge. Note how it sits in the housing, especially if it uses a center post or specific end orientation. Dispose of it according to local waste guidance.
- Inspect and clean the housing. Check the sump, cap threads, center standpipe, and O-ring groove for grit, cracks, warping, or damage. Clean with water and a clean cloth. Follow the manufacturer’s instructions if sanitizing is recommended; do not improvise chemical concentrations or contact times.
- Inspect the O-ring carefully. Remove it gently, clean the groove, and reinstall it evenly. Replace the O-ring if it is damaged or no longer fits securely. Apply only a small amount of approved silicone lubricant if the manufacturer calls for it.
- Install the new cartridge. Seat it squarely on the bottom post or in the housing as designed. Make sure it does not tilt, bind, or prevent the sump from closing fully.
- Reinstall the sump by hand. Thread it carefully to avoid cross-threading. Tighten according to the manufacturer’s instructions. Over-tightening can distort the O-ring, damage threads, and make the next service difficult.
- Restore water slowly. Close the open faucet, then reopen the inlet valve gradually. Allow the housing to fill and check around the cap, pressure-relief button, fittings, and bottom of the sump for leaks.
- Flush the new cartridge when required. Many sediment and carbon cartridges need flushing before normal use to clear trapped air, loose carbon fines, or manufacturing residue. Follow the cartridge manufacturer’s flushing instructions and direct flush water to a suitable drain or exterior location when appropriate.
What to Check After Replacement
Do not walk away immediately after installing a new filter. A small leak can become more obvious as pressure stabilizes and water demand changes.
- Look for drips around the housing seam and fittings after several minutes.
- Check again after water has been used at one or two fixtures.
- Listen for unusual sputtering, which may simply be air clearing from plumbing after service.
- Confirm that household flow has returned to normal.
- Check that any bypass valves are in their intended operating position.
- Record the replacement date, cartridge type, and any pressure-gauge readings.
A simple maintenance record can reveal useful patterns. If the same cartridge is clogging much sooner than usual, the well or plumbing may be producing more sediment than before. That can happen after heavy rainfall, drought conditions, well work, pump replacement, plumbing repairs, or changes in groundwater conditions. The right response may be a water test, well inspection, or a different pretreatment strategy—not simply replacing cartridges more often.
Credit: ebay.com
Common Whole-House Filter Replacement Problems
The Housing Leaks After Reassembly
Most post-service housing leaks come from an O-ring that is dirty, twisted, damaged, misplaced, or compressed incorrectly. Shut off the water and relieve pressure before reopening the housing. Clean the O-ring groove, inspect the seal, and make sure the sump is threaded straight.
Do not keep tightening a leaking housing. Excess force can crack the sump or cap. Replace visibly damaged components with manufacturer-compatible parts, and seek professional help for leaks at fixed plumbing connections or signs of a cracked housing.
Water Pressure Is Still Low With a New Filter
First, confirm that shutoff valves are fully open and that no bypass valve is partially closed. Next, determine whether the low pressure affects the entire house or only one fixture.
If the issue is house-wide, possible causes include a clogged prefilter, water softener restriction, pressure-system problem, plumbing obstruction, undersized filter setup, or limited well yield. If your filter has gauges, compare the pressure before and after the filter while water is running. A small pressure drop across a new filter suggests the restriction may be elsewhere.
The New Filter Turns Brown or Orange Quickly
Brown, orange, or reddish staining often points to sediment or iron-bearing particles, but appearance alone cannot identify the source. A fine sediment cartridge may capture oxidized iron particles, while dissolved iron can pass through until it changes form. If rapid staining is new or severe, testing for relevant water-quality parameters and reviewing the treatment sequence can help identify whether a sediment filter is being asked to do more than it can handle.
Black Specks or Cloudy Water Appear After Installing Carbon
New carbon cartridges can release fine carbon particles if they are not flushed as directed. Flush according to the product instructions. If black particles continue long after flushing, stop assuming the cartridge is the only cause; check for deteriorating plumbing components, treatment media, or other sources of debris.
When Replacement Is Not the Right Fix
Replacing a cartridge is appropriate maintenance, not a universal water-treatment solution. It may not solve persistent rotten-egg odor, recurring iron staining, bacterial contamination, acidic water, high nitrate, arsenic, or other dissolved contaminants. Each issue requires treatment matched to a confirmed water condition.
Contact a water-treatment professional, well contractor, or local health department when you have any of the following:
- A sudden change in water quality after flooding, well repair, nearby construction, or a known contamination event.
- Suspected sewage, fuel, chemical, or other harmful contamination.
- Repeated positive bacterial results or unexplained illness concerns related to water use.
- A cracked filter housing, recurring leaks, or plumbing that cannot be safely isolated.
- Rapid filter clogging that substantially affects household water supply.
- A treatment system with a control valve, regeneration cycle, electrical fault, or pressurized media tank that needs model-specific service.
If harmful contamination is suspected, use a known safe water source and contact your local health department for guidance. Boiling and ordinary cartridge filtration do not address every contaminant, especially many chemical hazards. Appropriate treatment should be selected based on testing and confirmed afterward when health-related contaminants are involved.
Credit: apecwater.com
Frequently Asked Questions
Can I reuse a sediment filter cartridge by washing it?
Only if the cartridge manufacturer specifically identifies it as washable or reusable. Many pleated, spun, string-wound, and depth filters are disposable. Washing a disposable cartridge can damage the media or leave trapped material behind, reducing performance and hygiene.
Should I turn off my well pump to change a whole-house filter?
It depends on the plumbing layout and manufacturer instructions. The essential requirement is to isolate the filter and fully relieve water-side pressure before opening the housing. Do not access pump wiring or pressure-switch electrical components unless you are qualified to do so.
Why does my filter housing have air trapped inside after service?
Air enters when the housing is opened. Restoring water slowly and flushing the cartridge as directed usually clears it. Brief sputtering at faucets can occur while air moves through the plumbing, but persistent air problems may point to a separate plumbing or well-system issue.
Can a whole-house filter improve well water that smells like sulfur?
Some systems can address sulfur-related odor, but the correct treatment depends on the cause and concentration, along with iron, manganese, bacteria, pH, and flow rate. A basic sediment cartridge usually will not solve a persistent rotten-egg odor. Testing helps determine the appropriate approach.
How do I know whether my filter is installed in the correct direction?
Look for a flow-direction arrow on the housing head, cap, or filter label. Water should enter and leave in the direction specified by the manufacturer. If the direction is unclear, consult the exact model manual rather than guessing, since incorrect flow can reduce performance or affect sealing.